Mosaizer Pro 12 -
Help Mosaizer Pro 12 -
Help |
Mosaizer Pro 12 -
Help
Masks
A mask is a (small) bitmap that
can show or hide portions of the picture cells that will be placed in the
photo mosaic. A mask is basically a greyscale bitmap with 256 shades of grey
from black to white. , All normal masks must
have the .jpg format to allow for use in the
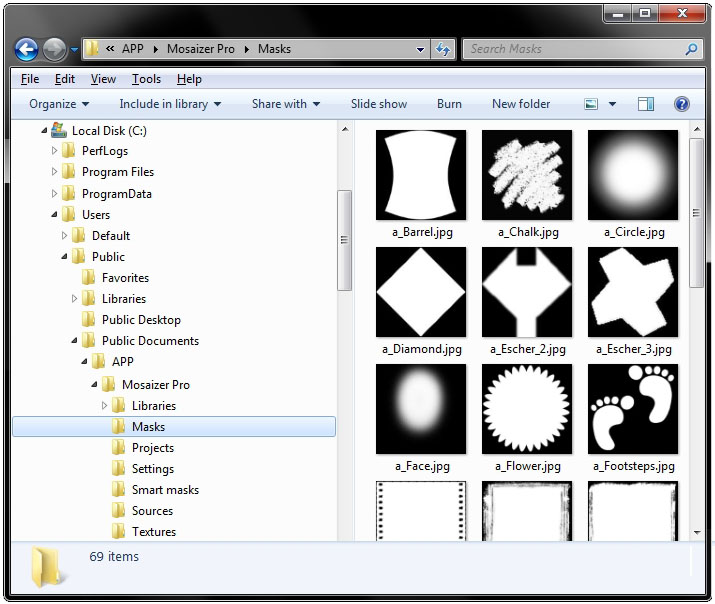
application. The masks that are shown here are the ones that are found in the
'/Masks' folder and pre-loaded after starting the application. To easily
recognize each mask, all masks usually have a prefix 'a_' for a normal mask, and
'b_' for brush masks. Brush masks are usually fully rotationable, and as a
consequence the mask appears to be somewhat small.
The 32Bit overlay and transparent mask must be of .png
or .bmp file format to be read by the application at start. Other file formats
are not recognized. It's highly recommended when new masks are added to the
'/Mask' folder, to use the file prefix 'o32_' to be recognized as
transparent masks. If .bmp files are added as transparent masks these must be
of 32bit format. At the end of this chapter it is shown how to make such a mask in Photoshop. The 'Masks'
button In this control window
all the mask settings are shown. In the drop-down list all the different
masks are found, where the selected mask is shown in the thumbnail box. The types of
mask Alpha mask
An alpha
mask is a 24bit bitmap with 256 shades of grey. The alpha masks that
are installed in Mosaizer have a dimension of 144x144 pixels. Black is opaque,
white is transparent, all shades in between are degrees of transparency. A good
example is the 'a_Circular.jpg' mask: the center is
fully opaque (showing the cell picture), fading to transparent (black) towards
the edges. As a result a circular picture will be seen on the canvas, fading to
the background towards the edges (picture below).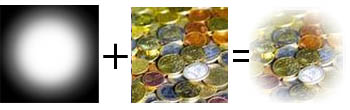
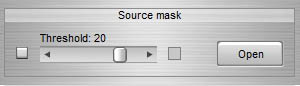
Source mask
Similar
to an alpha mask, a source mask is a 24bit bitmap with 256 shades of
grey. The source mask is used to filter the cells of the full mosaic
picture, instead of each individual cell. Only the pictures are placed on the
canvas where the source mask is not 100% black. So, by definition fully black counts
as 'no', any shade of grey and white count as 'yes'. The slider in the
control determines at which point ('threshold') the grey is counted as
'yes' (or 'no'). This control is found in the tab
'Specials'.
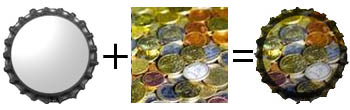
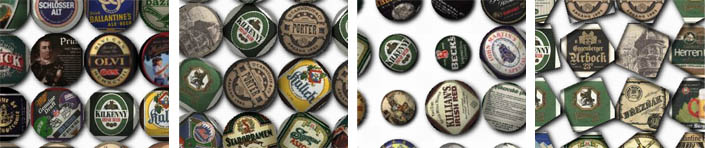
32Bit overlay mask
A
32bit overlay mask is a 24bit bitmap with 256 shades of grey with an
additional 8bit alpha channel. This bitmap conveniently combines the alpha mask
with an overlay mask. A good example is the 'o32_BeerCapsule.bmp' where the 3D effect is visible in the
24bit portion of the bitmap, and the outline is stored in the alpha channel.
This alpha channel only shows what portion of the 24bit part will be
transparent and what should be opaque (picture below).
32Bit overlay .PNG mask
This type of mask behaves identical
like the 32bit overlay mask but it is made from a .PNG file format. PNG
is a common standard file type ('Portable Network Graphics') where the bitmap
has a transparent channel. It is not entirely the same as a 32bit bitmap (.BMP
format). The .PNG file can easily be made with most bitmap editors with layer
capability. For example: create a new file in e.g. Photoshop, and transform
it into a layer. The layer is not transparent by default, so first delete
all pixels in that layer (now the blocked transparency pattern is visible).
Then copy or paint anything on that layer, colour or greyscale, while leaving
the transparent pixels out. That way the layer remain transparent where the
pixels are absent. As a precaution you better select all transparent pixels, and delete
these (again if necessary to assure the layer is truly transparent). Finally
save that layer in the .PNG file format. And that's basically
it.
Brush mask
This is
a mask that acts like an alpha mask, yet is used for a different purpose.
Brush masks can be rotated and resized without losing shape or detail in the
rotation. Therefore brush masks are rotational symmetric. A good example is the
mask 'b_Chalk.jpg' where the grey-scaled picture is
'confined' within a virtual circle.
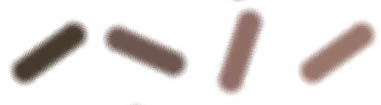
Mask rotation and resize
Each mask can be rotated and resized. The amount is set by three controls. The angle is set by two sliders, where each slider sets the limit of the rotation (start- and end angle).
When also the box 'Rotate tile' is checked, each miniature picture rotates along with the mask. Below some typical effects are shown, from left to right: rotated mask (-70 to +70 degrees), + rotate tile, + resize mask (50%). Since this example uses a circular mask, the effect of the rotation can't be seen unless the tile is rotated as well. In the last picture on the right a square mask is used, but this does not rotate very well, since the angles are cut off by the rotation.
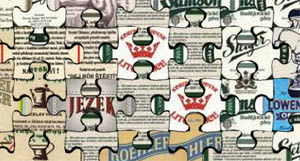
The checkbox 'Alternate mask rotation' is required to rotate the mask only on odd numbered tiles. This is be very useful for e.g. puzzle shaped masks. The example below shows the effect, with the notion that the background is set to black, and the 'Tilesize multiplier' was set to a value that each mask left a small gap between each tile, showing the black background. Furthermore, to get this effect in place, the number of tiles on the vertical axis must be odd numbered. To make sure this is the case you need to change the 'Amount' slider until you have an odd amount of tiles on the vertical axis. This number of tiles is echoed below the thumbnail picture of the source image (top-left).
The two options '1/2' and '1/4' indicate how the mask must be rotated: half circle (180 degrees) or a quarter circle (90 degrees). The example below has a '1/4' rotation and apply the next of the four sides of the puzzle mask.
Name conventions
Each mask in Mosaizer Pro follows a logical name convention. The user is free to give mask any name, but for clarity of intended use, the prefix of each mask is fixed according to the following rules:
How to make a 32bit .BMP mask
The best way to make an alpha or overlay mask is by using a bitmap editor like Photoshop (Elements) or Paintshop Pro. The alpha, source and overlay masks must be saved as a 24bit greyscale (jpg) image. To retain the quality of the mask when resized during use, the format must be a high quality jpg format (less quality will blow up artefacts from the jpg compression), except for 32bit masks, which must be in the 32bit bitmap format (*.bmp extension).
The 32bit overlays require more skills. In Photoshop Elements the following actions would be required to successfully make a 32bit overlay:
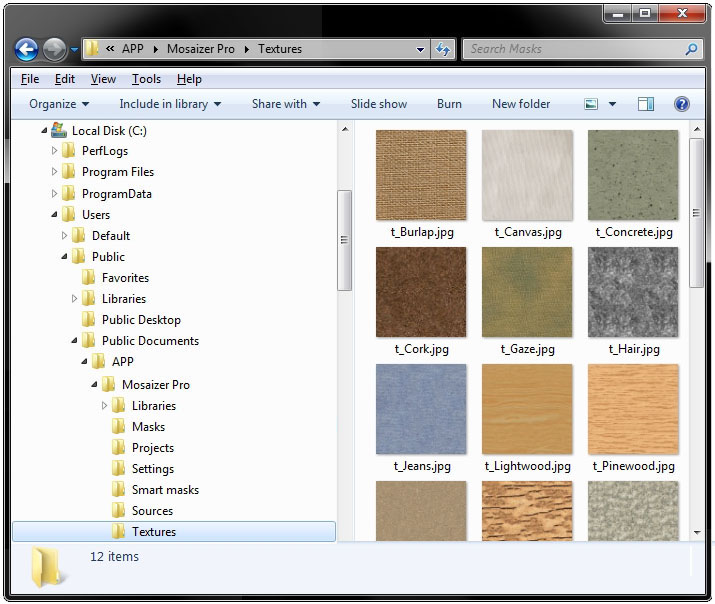
To add masks and textures to the application cannot be done via Mosaizer Pro. In previous versions this was possible, but in version 8 the user has to manually copy the mask to the correct folder.
The mask folder is located in C:\Program Data\APP\Mosaizer Pro 8\Masks (Windows 7) and C:\Documents and Settings\All Users\Application Data\APP\Mosaizer Pro 8\Masks (windows XP). Normal (24bit) masks MUST be of type .jpg, and the file name MUST start with 'a_' (alpha mask) or 'b_' (brush mask). 32bit Masks MUST be of type .bmp, and the file name MUST start with 'o32_' .
The texture folder is located in C:\Program Data\APP\Mosaizer Pro 8\Textures (Windows 7) and C:\Documents and Settings\All Users\Application Data\APP\Mosaizer Pro 8\Textures (windows XP). Texture filenames can be freely chosen but MUST be of .jpg type.