 Collaizer 3.0 -
Help Collaizer 3.0 -
Help |
Collaizer 3.0 -
Help
Getting started (user interface)
Collaizer is easy to use. On the left side the main menu
items are shown, when clicking on a menu item the work area is shown on the
right. There are three workflows: Photo library,
Collage and Tools. Each workflow has several functions.
Figure: The 'Home'
view Add
photos
The
selected folder is 'copied' into the collage picture library by pressing one of
the buttons at the bottom of this work area. Each button represents a different
way to add or replace images from the picture library (as it is shown in the
'Library' ). The
small button at the right
is a toggle to show images and detailed information (as you can also do in
the Windows Explorer). Figure: The 'Add photos' work
area Library management When
clicking on a picture the key data is shown in the area on the right. When you
want to save this picture selection, you can save is by pressing the 'Save current library' button. A pop-up window appears
requesting a library name. By default it also adds the number of currently
selected pictures: In
the pull-down box previously saved libraries can be reloaded ('Libraries on disk'). By pressing the 'Remove selected library' button the current library can
also be deleted from hard disk. The corresponding files are
never deleted, just the file that stores the names of
the library pictures. 
This work area is the explorer in which
you can select the picture folder you like to use for the collage. On the left
is the well-known explorer (as in Windows Explorer), on the right the pictures
are shown. Also non-pictures like .pdf files are shown, but these will not be
taken into account when making a
collage.
Add
this file to the library: the file that you selected when
right-clicking is transferred to the picture library of the
collage.
Add
this folder to the library: like the file, but now the entire folder is
transferred and added to the collage selection.
Replace current library with this folder: exactly as it
states.
Replace all: only when
this folder was added to the collage picture library the pictures will be
de-selected from the collage library.
Random select: the application will select 10 images each time you press this
button. In case the image is already present less images will be copied to the picture
library.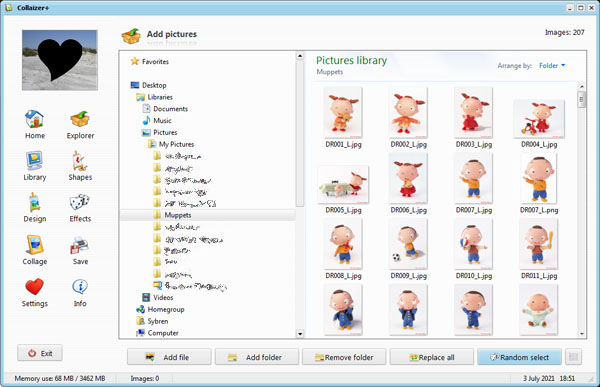
This work area is
the overview of all the pictures that are used to create a photo collage. Adding
and removing is done via the 'Add photos' work area (see
above).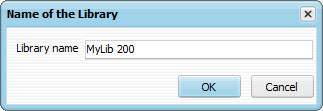

Figure: The 'Library management' work area
Collage lay-out
This work area is the main area to make the lay-out of
your photo collage. It has several work items: on the top a number of buttons
are available for layer management, on the right a series of art-work pictures
are shown. By clicking on a button or an artwork button, the function is
activated.
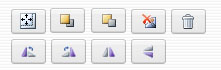
The artwork buttons, from left to right:

The shape and type selectors:
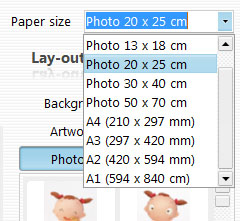
The paper size: select a paper size from the drop-down box. Typical photo sizes are possible, and paper sizes from (metric) A4 to A1. Please make sure you have A1 printing possibility before making any (very) large collage.
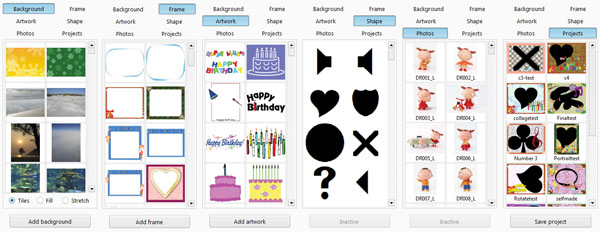
The artwork tabs. From left to right:
For artwork, frames and background, new folders can be conveniently be selected and added to the corresponding folders. Press the button (at the bottom of the application), e.g. 'Add frame'. A pop-up window is shown, from which you have to select the folder containing the new artwork, frame or backgrounds. When OK-ed, that folder is copied to the corresponding folder. The artwork becomes available immediately.
A final tab 'Projects' is used to load existing lay-outs or save new lay-outs. Simply drag and drop an existing project in the lay-out work area and that lay-out becomes active. All layers and artwork is exactly as it was done after saving.
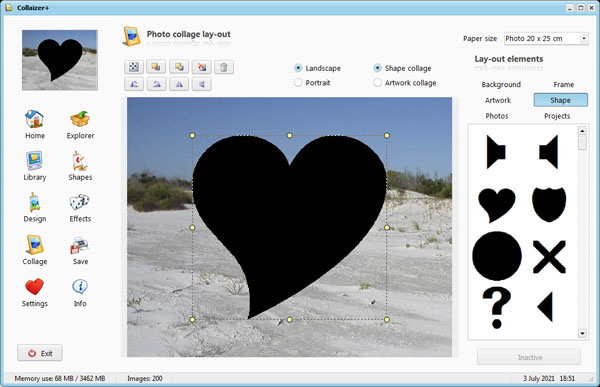
Figure: The 'Photo collage lay-out' work area
Drag and drop the
artwork
All artwork can be
drag-and-dropped from the active tab to the work area. When dropped, a rectangle
is visible to move, resize or rotate the artwork to match with the intended
position and size. To rotate the artwork, the CTRL key must be pressed
first, while moving the mouse at a corner of the artwork. A rotation arrow
becomes visible and the artwork can be rotated. Releasing the CTRL key will
change the mouse pointer to resize and move.
Photo collage creator
This work area is the last step in creating the photo collage. When the collage is
ready, simply press the button at the botton 'Create collage', and wait for the
results.
A little tweaking is still posible ('Collage options' and 'Settings'):

Figure: The 'Photo collage creation' work area
The Shape
editor
In this work area you can create your collage shape.
Drag-and-drop any shape from right to left in the editor area. The tools on the
top
are used to change your selected basic shape.
When the CTRL key is pressed while dragging a shape, this shape is
added to the existing shape in the editor.

The follow shape controls are available (from left to right):

The shape font can be selected, using the pull-down box: Webdings, Wingdings, Wingdings 2 and Wingdings 3. If Any of these fonts is not available on your system, the corresponding shapes won't be visible.

Figure: The 'Shape editor' work area
The Graphic
effects
In some cases you might want to create a little grphic
effect to your photo collage. We have provided a few simple effects to the
application, with which (mainly) color changes can be made. A few preselections
are available and
a more elaborate color tuning:
The effect of the filters will only apply to the photo collage pictures, and not to the artwork. To tune the eeffect, try out a few settings and see the result. The slider at the bottom can be used to zoom in or out to see more details of the result. The picture in the double viewer has a predefined (small) size, and does not reflect the full size of the the sample picture.
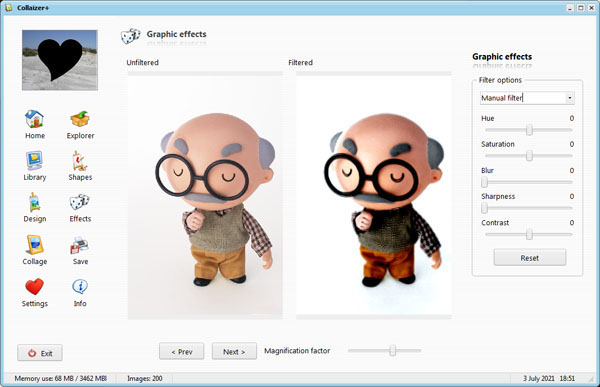
Figure: The 'Graphic effects' work area
Print and Save:
result of the photo
collage
When the photo collage is ready, the print and save work
area is now shown. A number of
convenient controls are now visible.
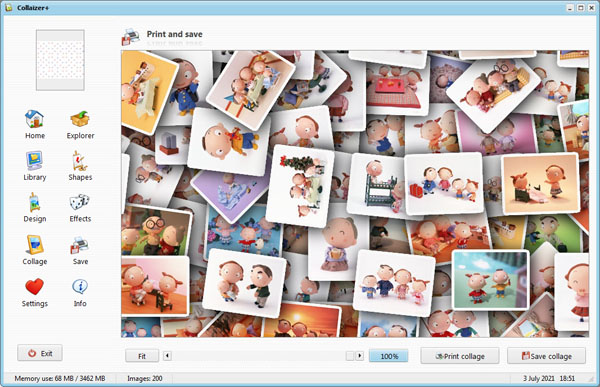

Figure: The 'Print and save' work area
The
Defaults
Most
of the settings in the application can be changed. All the settings in the
'defaults' work area are stored and used when the application is
next started. There are several settings to choose from. All these settings
are stored in the configuration file. For that reason you need admin
rights to use Collaizer under Windows 10!.
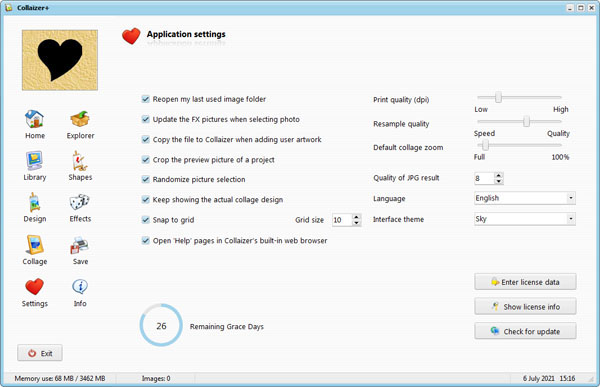
Figure: The 'Default settings' work area
Updates
The application can check for new updates at start (can be turned off). If updates are available, the application will indicate this and the user can download the updates. The application must be closed, and the updates must be installed as the current application has been installed, and with the same conditions (admin
rights are needed).

Figure: Part of the 'Updates' work area
About and
help
This work area has two possble views: connect to our website, and show the web help (this help file). The 'Back' button is only used for internet browsing, not for the help file.
The current version of Collaizer is
indicated in the right top corner. In case you want to make a comment on the
application by e-mail, please indicate this version in the correspondence.
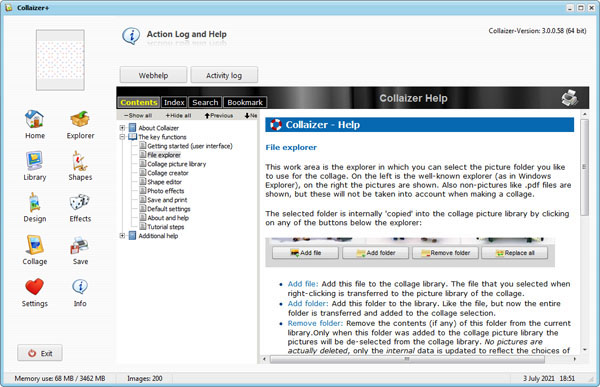
Figure: The 'About Collaizer & Help' work area